
I came upon the We Love Colors website because I was looking for a pair of neon yellow tights. Not only did I find them, I also found an awesome tie-dyed leotard! I wanted to use it for everyday wear, so I converted it to a bodysuit with a snap crotch. In this tutorial, I will show you how to do the same!
What you will need:
-
- Leotard
- Snap tape, or loose sew-on snaps
- Seam ripper
- Scissors
- Measuring tape
- Pins
- Sewing machine, or hand-sewing needle and thread
- Depending on your desired finishing method, you’ll want either:
- A package of extra wide double-fold bias tape or wide, soft elastic (1 ¾” – 2” wide)
Instructions:
1. Try on the leotard and determine whether the length in the crotch is comfortable. If so, you can use the bias tape finishing method. If you are a bit long in the torso or find the leotard leg openings to be too tight, you may want to extend the length for greater comfort, using wide elastic. I’ll get into that a little more at the end of the tutorial.
2. Take your seam ripper and open up the crotch seam. You will need to cut through the elastic for the leg openings on each side of the leotard.If you are planning to extend the length, try on the leotard again and use the measuring tape to determine how much you need to add.
3. For the bias tape finishing method, cut 2 pieces of double fold bias tape the length of the seam you just opened up.
4. Unfold the 2 short edges of the bias tape so you have a wide piece of tape just folded in half. If you want, you can re-press the bias tape with an iron so it is exactly folded in half (since one side of bias tape is usually shorter than the other).
5. The goal here is to create a small extension for the front and back of the crotch so you don’t lose any length when you apply the snaps and overlap the ends of the converted bodysuit. The bias tape also gives a tidy finish to the raw ends. Pin the folded bias tape in place over each end, just barely encasing them, with about ¼” or so of the leotard fabric inside the bias tape extensions.
6. Stitch the bias tape in place with a zig-zag stitch on your machine, or by hand sewing.
7. Now cut your snap tape to fit the length of the bias tape.
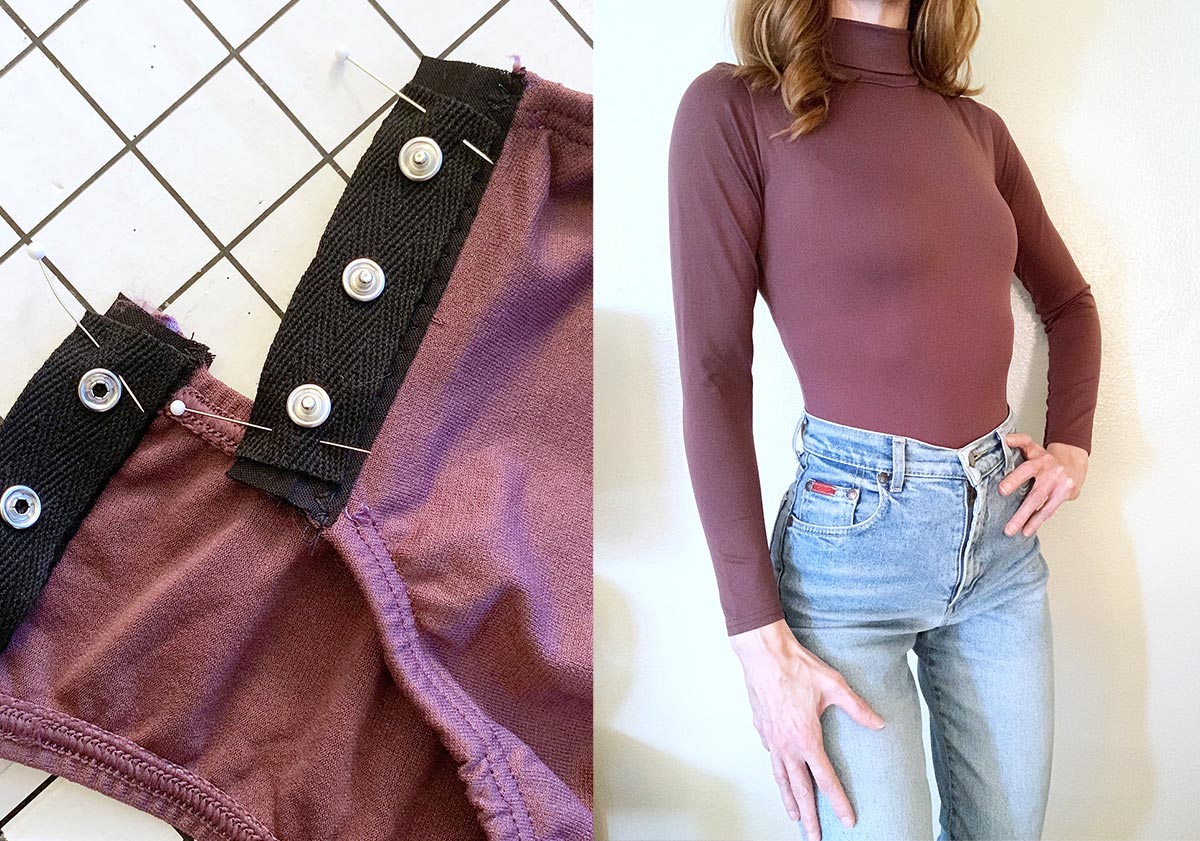
8. Pin into place. Pay attention here to how you want the bodysuit snaps to overlap. Here I am planning to have the front edge overlap the back, so I will sew one half of the snap tape to the inside of the front, and the other half to the outside of the back.
9. Stitch the snap tape into place with a narrow zigzag stitch on your machine. Use a zipper foot so you can sew close to the snaps. Be sure to reinforce the cut edges (the 2 short ends) of the snap tape by going over them a few times with your zigzag stitch.
10. You can also achieve the same result by hand sewing loose snaps onto your bias tape extensions instead of using snap tape (or you can hand sew the snap tape into place).
You are all finished with the bias tape method!
Now we’ll talk about extending the length. For the tie-dyed bodysuit, I wanted to add a few more inches for comfort, so I use a piece of wide, soft elastic sewn to the back edge. The finish is not necessarily beautiful, but it’s very functional and will be hidden!
Enjoy wearing your bodysuit! With the leotards from We Love Colors, you could have one in every color of the rainbow! They look great with full skirts, rigid denim, or loose pants, to avoid any visible panty line. 
Tutorial by Emily Stone


